
Last updated September 3, 2026
Gate Repair Maintenance Checklist for Seattle Homeowners
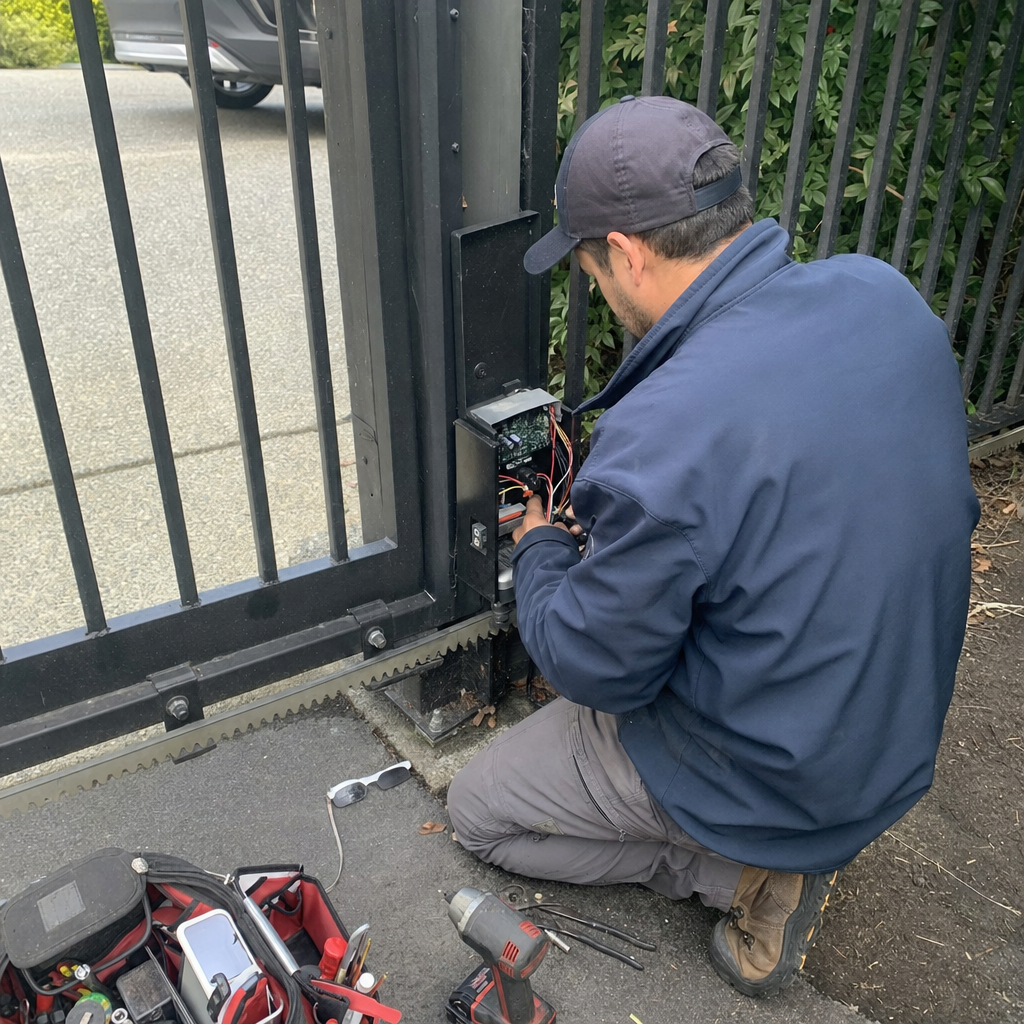
After 14 years of service calls across Seattle, the single most common thing David Martinez hears before a gate completely fails is: “I thought it just needed some WD-40.” The right maintenance checklist would have caught it six months earlier for under $30. Seattle’s unique combination of relentless moisture, clay-heavy soils in neighborhoods like Ballard and Queen Anne, and salt-laden air near Puget Sound creates failure patterns that generic checklists miss entirely. This guide isn’t the longest gate maintenance resource you’ll find — it’s the one built from actual repair calls in Capitol Hill, West Seattle, and the Eastside, where we’ve learned which small habits prevent $800 Gate Repair services.
Quick Answer
A proper gate maintenance checklist for Seattle homeowners includes monthly visual inspections, quarterly lubrication with moisture-resistant products (never WD-40), pre-winter electrical and sensor testing, and annual post-footing checks for clay-soil heave. Following this schedule typically prevents 70% of the emergency gate repairs we perform in the Seattle metro, as detailed in our guide to Gate Repair Permits, Codes & Inspections in WA: What You Need to Know.
Table of Contents
- Why Seattle’s Climate Demands a Different Checklist
- Monthly Gate Maintenance Tasks
- Quarterly Deep Maintenance
- Pre-Winter Electrical & Sensor Protocol
- Annual Structural & Rust Inspection
- The Right Lubrication for Seattle’s Wet Climate
- Common Mistakes to Avoid
- When to Call a Professional
- Frequently Asked Questions
Why Seattle’s Climate Demands a Different Checklist
Generic gate maintenance guides written for Phoenix or Portland miss the specific failure cascade that happens in Seattle. Here’s what 14 years of local service calls have taught us.
Moisture penetration, not wear, is the primary killer. Seattle averages 37 inches of rain annually, but it’s the 150+ days of measurable precipitation that matter more than the total volume. Constant dampness finds its way into motor housings, junction boxes, and swing-arm pivots that stay wet for weeks. We’ve replaced more gate motors in Magnolia and Leschi due to internal condensation than due to actual mechanical wear.
Clay soils heave and settle on a different cycle. Seattle’s glacial till and compacted clay — especially in neighborhoods built on former wetlands like parts of Ravenna and Georgetown — expand dramatically when saturated. A gate post that was plumb in September can lean 2-3 degrees by March. Catch this early, and it’s a footing adjustment. Miss it, and the gate frame twists, hinges bind, and the automatic opener overworks itself to failure.
Salt corrosion accelerates near marine air. Homes within a mile of Puget Sound or Elliott Bay see faster oxidation on hardware than inland properties. It’s not dramatic red rust — it’s the white, powdery corrosion on aluminum components and the pitting on stainless fasteners that weakens them over 3-4 years instead of 10.
Temperature swings are mild but deceptive. Seattle’s freeze-thaw cycles are fewer than the Midwest’s, but when they hit — typically late November through February — they catch homeowners off-guard. Water that seeped into micro-cracks in concrete footings expands, and by spring the post has shifted.
These four factors mean a Seattle checklist must prioritize moisture management and structural monitoring over the dust-and-heat concerns that dominate generic guides.
Monthly Gate Maintenance Tasks
These five checks take under 10 minutes and prevent the majority of emergency calls we receive in Seattle.
- Visual sweep for debris accumulation. Check the gate track, swing arc, and motor housing for leaves, moss, and sediment. Seattle’s bigleaf maple and Douglas fir shed heavily October through December. A packed track forces sliding gate motors to draw excess amperage — the silent precursor to burnout.
- Listen to the motor. Run the gate through a full cycle and note any changes in sound. A healthy LiftMaster or FAAC operator has a consistent hum. Grinding, clicking, or labored startup in Seattle’s damp months often indicates moisture in the gearbox or beginning bearing corrosion.
- Check safety sensors. For automatic gates, verify photo-eye alignment and wipe lenses with a dry microfiber cloth. Seattle’s persistent drizzle creates a film that scatters the beam without fully blocking it — the gate “hesitates” or reverses randomly. Homeowners in Windermere and Laurelhurst frequently misdiagnose this as a motor problem.
- Inspect drain paths around posts. Standing water at the base of gate posts is the earliest warning of footing trouble. In Seattle’s winter, a puddle that persists more than 48 hours after rain indicates poor drainage or soil compaction that’s accelerating frost heave.
- Test manual release. Every automatic gate system — Viking, Ghost Controls, DoorKing, Elite, or otherwise — has a manual override. Verify it functions smoothly. If it’s stiff or corroded, address it now; you don’t want to discover the problem during a power outage in a January storm.
Quarterly Deep Maintenance
Every three months, set aside 45 minutes for these tasks. We schedule ours around the equinoxes and solstices — easy to remember, and timed to catch seasonal transitions.
Hinge and pivot lubrication. This is where most Seattle homeowners go wrong. WD-40 is a solvent and water displacer, not a lubricant. It evaporates within days and leaves a sticky residue that traps Pacific Northwest moisture. Instead, use a lithium-based grease with corrosion inhibitors for metal-on-metal points, or a dry PTFE spray for precision components. Apply sparingly — excess attracts dirt that becomes grinding paste.
Electrical connection inspection. With power safely disconnected, open junction boxes and examine wire nuts, terminal blocks, and low-voltage connections. Look for green corrosion (copper oxidation) or white powder (aluminum oxidation). In Seattle’s climate, we’ve found failed connections in Gatewood and Broadmoor that looked fine externally but had corroded internally. Tighten, clean with electrical contact cleaner, and replace wire nuts showing any degradation.
Post and footing examination. Use a level to check plumb on all posts. In clay-soil neighborhoods like parts of Northgate and Lake City, a quarter-inch lean in three months is significant. Mark the post base with a pencil line at ground level — if soil has shifted above or below this line, footing movement is active.
Hardware torque check. Hinge bolts, track brackets, and opener mounting hardware loosen from vibration and thermal cycling. Check with a wrench — don’t overtighten, but verify nothing has backed off. Pay special attention to cantilever gate roller assemblies, which take concentrated stress.
Access control functional test. Test all entry methods: remote, keypad, intercom, vehicle loop, and any app-based control. Replace remote batteries before they weaken — a remote that requires double-pressing is often a battery on the edge of failure, and Seattle’s cold snaps finish them off.
Pre-Winter Electrical & Sensor Protocol
The single highest-leverage maintenance window in Seattle is mid-October, before the rainy season fully arrives. Here’s the protocol David Martinez developed from years of preventable winter failures.
Step 1: Seal inspection. Examine all gaskets, conduit seals, and motor housing seams. Replace any that are cracked or compressed. Water ingress in October becomes ice expansion in January — we’ve replaced control boards in Madrona and Montlake that failed from this exact progression.
Step 2: Heater function test. If your gate motor or control box has an internal heater or thermostatically controlled fan, verify operation. These components are easy to forget until a 28-degree morning reveals a frozen gearbox. Ghost Controls and some DoorKing models have indicator lights for heater status — check your manual.
Step 3: Drainage verification. Pour a bucket of water at each post base. It should disperse within minutes, not pool. If it pools, improve grading or install a French drain segment. In Seattle’s saturated winter soils, standing water at the post base is the strongest predictor of spring alignment problems.
Step 4: Sensor beam path clearing. Trim vegetation back 18 inches from photo-eye paths. Winter storms drop branches, and Seattle’s overcast skies mean sensors run at lower margin — partial obstruction that summer sun power overcame becomes a reliability problem in December’s gloom.
Step 5: Backup power verification. Test battery backup systems under load. Seattle’s windstorm-related outages peak November through February. A battery that shows “charged” on indicator may not deliver sufficient amperage to cycle a gate under mechanical load. Time a full cycle on battery power — if it’s more than 30% slower than line power, replace.
Annual Structural & Rust Inspection
Once yearly — we recommend August, when Seattle’s dry spell allows thorough assessment — perform this comprehensive structural review.
Rust assessment protocol. Not all oxidation is equal. Surface rust on iron or steel — reddish, flaky, but leaving solid metal beneath — can be wire-brushed and coated with a rust-converting primer followed by enamel. But structural corrosion shows as pitting, section loss, or rust bleeding through from inside tubular members. We’ve seen ornamental iron gates in Queen Anne and Madison Park that looked merely “weathered” but had lost 40% of their wall thickness to internal corrosion. Tap suspect areas with a hammer — a dull thud instead of ring indicates hollowed metal.
Weld inspection. Examine all factory and field welds for crack initiation, especially at stress concentrators: corners, bracket attachments, and where pickets meet frames. Seattle’s thermal cycling, though mild, accumulates fatigue at these points. Hairline cracks visible only in raking light are the stage to catch them — before they propagate through the section.
Concrete footing evaluation. Check for spalling, cracking, or soil recession exposing the footing edge. In Seattle’s seismic zone, adequate embedment depth matters for gate stability. If frost heave or erosion has exposed more than 2 inches of the footing above finished grade, backfill and compact, or consider underpinning if movement is ongoing.
Automatic opener force and limit settings. Gate openers have adjustable force and travel limit settings that drift over time. Verify against manufacturer specifications using the manual — not memory. An opener that’s “always worked fine” may be running 30% over force limits, masking developing mechanical problems and creating safety risk.
Full-cycle timing benchmark. Time a complete open-close cycle and record it. Next year, compare. A 15% slowdown typically indicates developing mechanical resistance — bearings, track alignment, or motor degradation — before any audible symptom appears.
The Right Lubrication for Seattle’s Wet Climate
This deserves its own section because it’s the most common and costly mistake we encounter.
WD-40: the wrong tool for the job. We mention it repeatedly because we remove its residue weekly. WD-40 displaces water and penetrates rust — useful for freeing a seized bolt, useless for ongoing lubrication. In Seattle’s climate, it washes away within days and leaves a hygroscopic film that actively attracts moisture to bare metal.
| Component | Recommended Product | Application Notes |
|---|---|---|
| Hinge pins & bushings | White lithium grease (NLGI #2) | Apply thin film; wipe excess. Reapply quarterly. |
| Track & roller wheels | Dry PTFE spray | Attracts no dirt. Critical for sliding gates in leaf-heavy areas. |
| Chain drives | Synthetic chain & cable fluid with corrosion inhibitor | Not motor oil — too viscous for Seattle’s cold starts. |
| Lock cylinders & small mechanisms | Graphite powder | Never liquid lubricant — gums in damp conditions. |
| Stainless fasteners | Anti-seize compound (nickel-based) | Prevents galling during future service. |
Apply lubricants during a dry forecast window — rare in Seattle, so watch for August-September opportunities. After application, cycle the gate several times to distribute, then wipe all external surfaces clean. Visible lubricant is excess lubricant.
Common Mistakes to Avoid
- Using pressure washers on gate motors or control boxes. The moisture forced into seams and gaskets causes more damage than the dirt removed. We’ve replaced FAAC and Linear control boards in Magnolia after well-intentioned “deep cleans.”
- Ignoring slight gate drag as “normal aging.” A gate that requires 20% more force to move than when installed is telling you something specific — hinge corrosion, track misalignment, or opener degradation. Address the cause, not the symptom.
- Applying automotive grease to gate components. It’s formulated for high-temperature, high-speed bearings, not slow-speed, high-load gate hinges. It separates in Seattle’s cold and attracts abrasive grit.
- Waiting for visible rust before acting. By the time rust is visible on the exterior of a tubular steel gate, internal corrosion may be advanced. Annual tapping and weight comparison against original specs catches this earlier.
- DIY welding on load-bearing gate components without structural assessment. Seattle’s seismic and wind loads are calculated into original designs. An amateur weld may hold statically but fail dynamically. We’ve seen gates in Ballard that “looked fine” after homeowner repairs separate at the weld line under wind load.
- Skipping manual release testing until emergency need. The release mechanism is safety-critical and corrosion-prone. Test it quarterly — not annually, not “when you think of it.”
- Assuming all stainless steel is equal. Hardware-store stainless fasteners are often 304 grade — adequate inland, but marginal within a mile of Puget Sound’s salt air. 316-grade hardware lasts 3x longer in marine exposure; it’s worth the upgrade when replacing.
When to Call a Professional
Some gate maintenance crosses into work that requires specialized knowledge, tools, or safety awareness. Call Liberty Bell Gate Repair Washington home when you encounter: structural corrosion with section loss; concrete footing cracks or significant settlement; automatic opener force settings that require adjustment; welding needs on load-bearing components; or electrical faults beyond loose wire nuts. David diagnoses these issues himself — you’ll get 14 years of gate-specific expertise, not a dispatched subcontractor learning on your property. Gate Repair in Tacoma and surrounding areas, we offer free estimates — call (855) 275-6878.
Frequently Asked Questions
Monthly visual checks, quarterly lubrication and hardware inspection, pre-winter electrical protocol in October, and comprehensive structural review annually in August. This schedule prevents roughly 70% of emergency repairs in Seattle’s climate. Call (855) 275-6878 if you’re unsure where your gate stands — estimates are free.
WD-40 is a water displacer and solvent, not a lubricant. It evaporates within days and leaves a sticky residue that traps Seattle’s persistent moisture against metal surfaces, accelerating corrosion. Use lithium grease or PTFE spray instead. If your hinges already have WD-40 residue, clean with solvent and reapply proper lubricant.
Professional preventive maintenance visits in the Seattle metro typically range from $150–$350 depending on gate type, access control complexity, and whether structural welding or motor adjustment is needed. Emergency repairs after failure average $400–$900. The maintenance visit is the better investment. Call (855) 275-6878 for exact pricing on your specific gate.
Yes — moisture ingress is the leading cause of automatic gate opener failure in Seattle, more common than mechanical wear. Properly sealed motor housings, functional gaskets, and heater verification before winter are essential. We’ve replaced more openers in moisture-exposed locations than in any other failure mode.
Progressive gate binding that worsens in winter and improves in summer; visible post lean detectable with a level; gaps that open or close between gate and latch seasonally; and opener strain indicators like slower cycle times or thermal overload trips. These patterns are common in Seattle’s clay-soil neighborhoods like Northgate, Lake City, and parts of West Seattle.
Surface rust with no section loss is repairable. Structural corrosion — pitting, wall thinning, or rust bleeding from inside tubular members — typically warrants replacement or major component rebuilding. The critical distinction is whether the metal’s load-bearing capacity remains intact. David Martinez can assess this in person; call (855) 275-6878 for a free evaluation.
The Bottom Line
Seattle’s climate demands a gate maintenance checklist built for moisture management, clay-soil monitoring, and marine-corrosion awareness — not the generic advice that works in drier climates. The homeowners who avoid emergency repairs aren’t necessarily spending more time on maintenance; they’re spending it on the right tasks at the right intervals. Monthly attention to debris and sound, quarterly proper lubrication, October electrical preparation, and August structural review catches problems when they’re $30 fixes instead of $800 emergencies. For more guides & resources, explore our blog. From the motor to the weld, 14 years of Seattle gate work confirms: prevention isn’t complicated, but it is specific.
Written by David Martinez, Owner & Lead Technician at Liberty Bell Gate Repair Washington, serving Seattle since 2012.